Innovative technologies make the modern world mobile, providing people with opportunities for enhanced performance. Businesses get the chance to operate remotely. Thus, setting up a home network lab is not a new case nowadays.
More and more businessmen turn to this solution due to the ability to simplify the workflow. Having a home-settled system helps perform effectively, solve problems urgently, and increase the efficiency of business running. Thus, it’s important to realize how to build a network lab at home. Below, we explain how to cope with this task and minimize the risk of making mistakes.
Planning Your Home Network Lab
Arranging the home IT lab starts with a preparatory process when a user thinks over a future infrastructure. At this stage, it’s necessary to assess all aspects and obtain strategic info to build a stable basis for system deployment. Here, the user should evaluate the available resources by answering the following questions:
- What are the objectives of IT infrastructure settlement?
- What tasks is the system going to perform?
- What is the budget for a home lab arrangement?
- What space is available?
The main task of planning the home lab is to find a suitable premise, assess its size, and evaluate budgeting for a home lab. Based on this information, future steeps are enrolled.
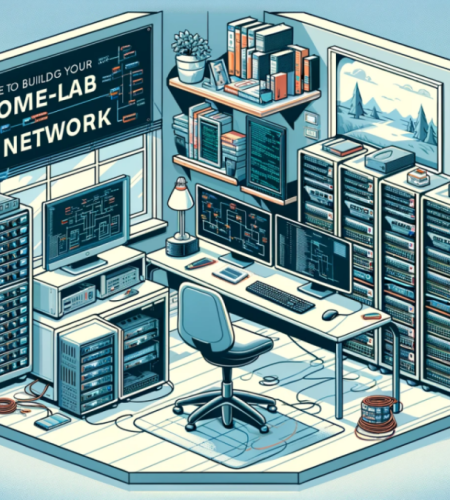
Essential Equipment for Your Home Lab
Once the budget is determined and the space is selected, it’s possible to move on to equipping the IT infrastructure. Now, you can proceed to hardware and software selection and make a list of required components to arrange a single working unit. When settling on a home-based network system, the following components are essential
- Racks or cabinets. It is an indispensable part of server infrastructure since you need some furniture where hardware is placed and stored. Racks come as the best solution since they are specifically designed to accommodate network equipment. These are multi-tier, highly durable, and functional metal constructions designed with all the fasteners and tech holes.However, you should choose it last of all since you’ll realize the needed size when the list of devices is determined. For instance, a 6U rack cabinet is an excellent solution for compact desktop systems while large-scale infrastructures require bigger models. Sysrack is a trusted supplier of high-quality durable furniture for home labs. A wide range of models from small to spacious ones is provided. Managers help pick the best option.
- Servers. When considering how to build a home network lab, note that these devices come as obligatory personal lab equipment. These components come as the “heart” or “brain” of the IT infrastructure. They are responsible for storing information, processing data, and solving complicated tasks.
- Routers and switches. They are designed to ensure smooth and uninterruptible communication between units and devices.
- Patch panels. They are used for connecting cables with different types of jacks and enabling connections between network equipment.
- Air cooling devices. Since hardware emits much heat, it’s necessary to install fans or other ventilation devices to maintain the optimal temperature and remove heat effectively.
Besides, remember to use climate control tools, security sensors, and accessories for easy and reliable hardware mounting.
At this stage, it’s advisable to make a 3D visual layout using virtualization platforms. It allows for eliminating common mistakes and designing the best in-rack network configuration and testing. When designing the layout, make sure to leave extra space for further scalability and upgrades. It’s most likely that you’ll expand the infrastructure in the future.
Setting Up Your Home Lab
Now, it’s time to get from theory to practice. When all the equipment is gathered, you can assemble the system. So, let’s consider how to build a homelab. Here’s a step-by-step guidance.
- Assemble the chosen rack or cabinet. Use an assembly manual to ensure correct and durable fastening. Depending on the construction, use dowels, screws, or other tools.
- Install hardware and fasten all the components in accordance with the pre-arranged 3D layout. Start with active equipment (servers, computers, routers).
- Mount ventilation devices and security monitoring sensors.
- Wire cables. Use organizers, hooks, ties, and other accessories to prevent tangling and ensure compact routing. Labeling is used to simplify further cord identification.
When all the devices take their place, think about remote access setup tools to be able to adjust the system remotely.
Security and Monitoring
Network hardware is highly vulnerable to external impacts. Thus, when considering how to set up a home lab, it’s important to ensure a sufficient security level. The following network security practices are applied:
- The use of locking systems, biometrical passes to cabinets, etc.
- The installation of surveillance devices and security sensors.
- Setting up an alarm system to notify about all accesses.
The implementation of learning network protocols helps increase the level of system protection. Modern technologies make IT infrastructures more secure and allow for monitoring their performance.
Maintaining and Upgrading Your Lab
Once the system is assembled and configured, timely maintenance is required. When developing DIY networking projects, make sure to keep them relevant with technological advancements. Integrate new IT solutions for monitoring and troubleshooting to simplify system functioning and ensure prompt maintenance. IT skills development helps implement updates timely and use effective solutions for your systems to improve their operation.
Now, you know how to create a homelab with maximum efficiency and minimum mistakes. Try to reduce network experimentation and act in accordance with this plan to achieve high productivity and design the perfect IT infrastructure.